Setup Canopy and Jira
Canopy integration with Jira has been tested on Jira Cloud and Jira. However, custom deployments may require adaptations to the process described below.
Why Jira?
What we typically see in the pentest and security assessment process is that the end product is a PDF document, and possibly a XLSX. This pushes the responsibility onto the “client” (or recipient of that data) to move it into other systems so people can use it. In some cases, the XLSX is the “system” in use, which makes tracking and correctly resolving security issues difficult.
We believe that Canopy should be a cog in the overall process of helping users manage their security. Jira is one of the most common ticketing systems in use, and so it makes sense that Canopy should support integration to help the data flow more easily from security assessments to the developers, IT operations teams and others who need it.
Jira support in Canopy
Canopy supports the following:
Connecting to one or multiple Jira instances.
Creating Jira tickets from Canopy findings.
Linking Canopy findings to an existing Jira ticket.
Creating findings as sub-tasks on existing Jira tickets.
Link to Jira ticket from Canopy for easy navigation.
Field mapping between Canopy and Jira.
It is currently not possible to receive notifications from Jira when an issue’s status has been updated, or when any other changes on the Jira side occur, or to push updated information from Canopy to Jira, if the content has been changed in Canopy. Also, Jira is responsible for content management on its side.
In 2019 (Q1 and Q2), CheckSec will be working on further integration with Jira, including support for Jira webhooks to facilitate bi-directional communication between Jira and Canopy. E.g. for status updates, comments, and so on.
Jira and Canopy setup
Getting a token from Jira
Connecting to Jira requires a token. Jira supports OAuth. To obtain a token and set up Canopy on your Jira system, please follow these steps:
https://developer.atlassian.com/cloud/jira/platform/jira-rest-api-oauth-authentication/
On the Canopy server execute
openssl genrsa -out privkey.pem 2048
openssl rsa -pubout -in privkey.pem -out pubkey.pem
In Jira, as an admin user, navigate to Jira Settings (cog) -> Products -> Application Links
Create a new application link

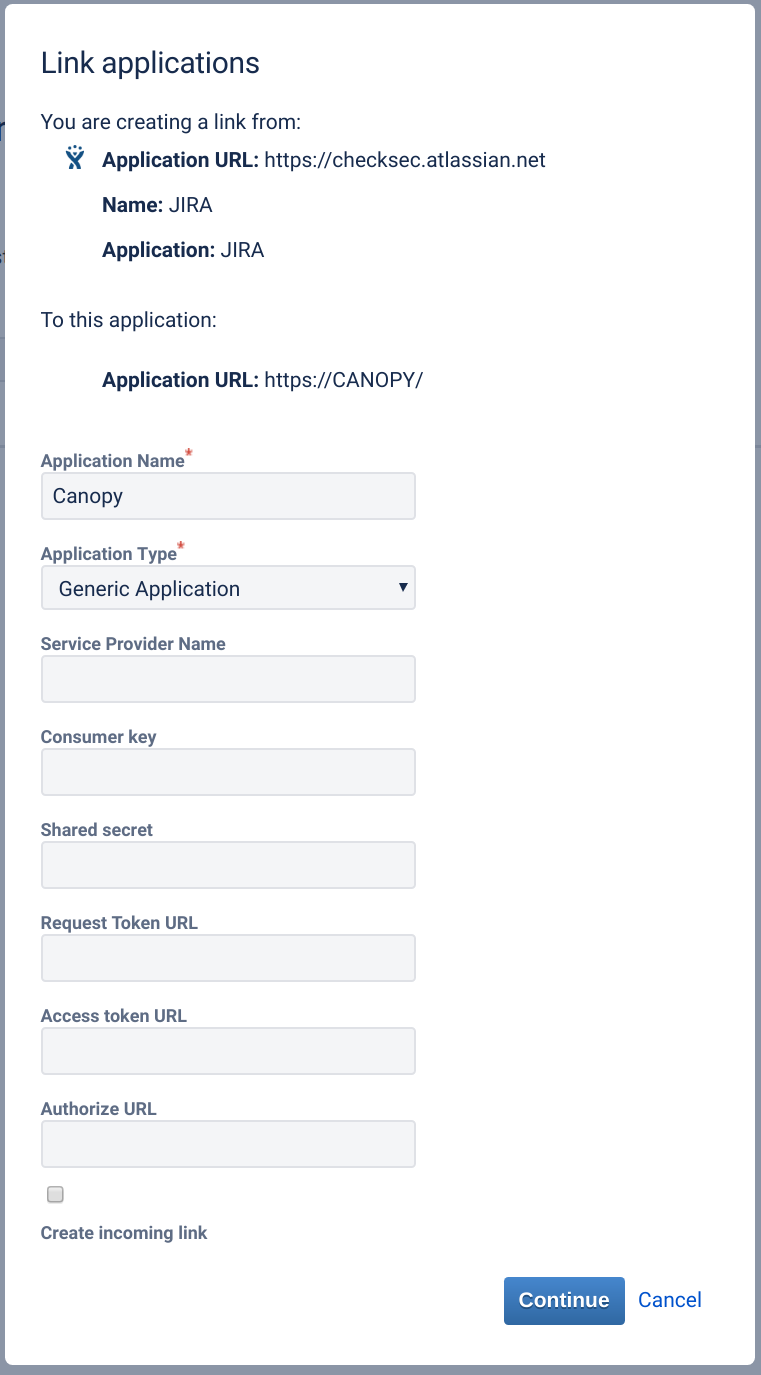
Edit the newly created application link and select the ‘Incoming Authentication’ section
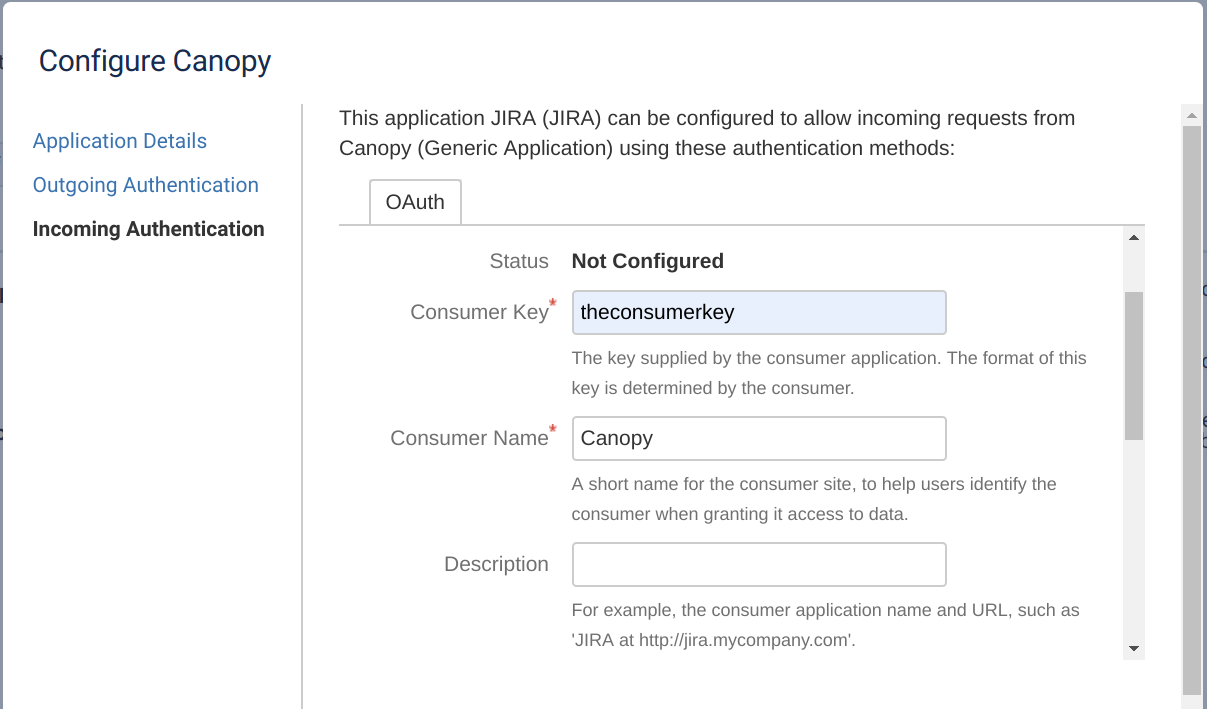
Populate the Consumer Key, Consumer Name fields and use the contents of
pubkey.pemfor the Public Key.Back on the Canopy server, execute
/opt/checksec/canopy/bin/jirashell -s https://checksec.atlassian.net -od -ck THE_CONSUMER_KEY_SET_IN_JIRA -k privkey.pem -pt
Authenticate as the user that Canopy will use via the URL provided by jirashell.
Take note of the
access_tokenandaccess_token_secretas these values are required inside of Canopy.
Adding a Jira instance to Canopy
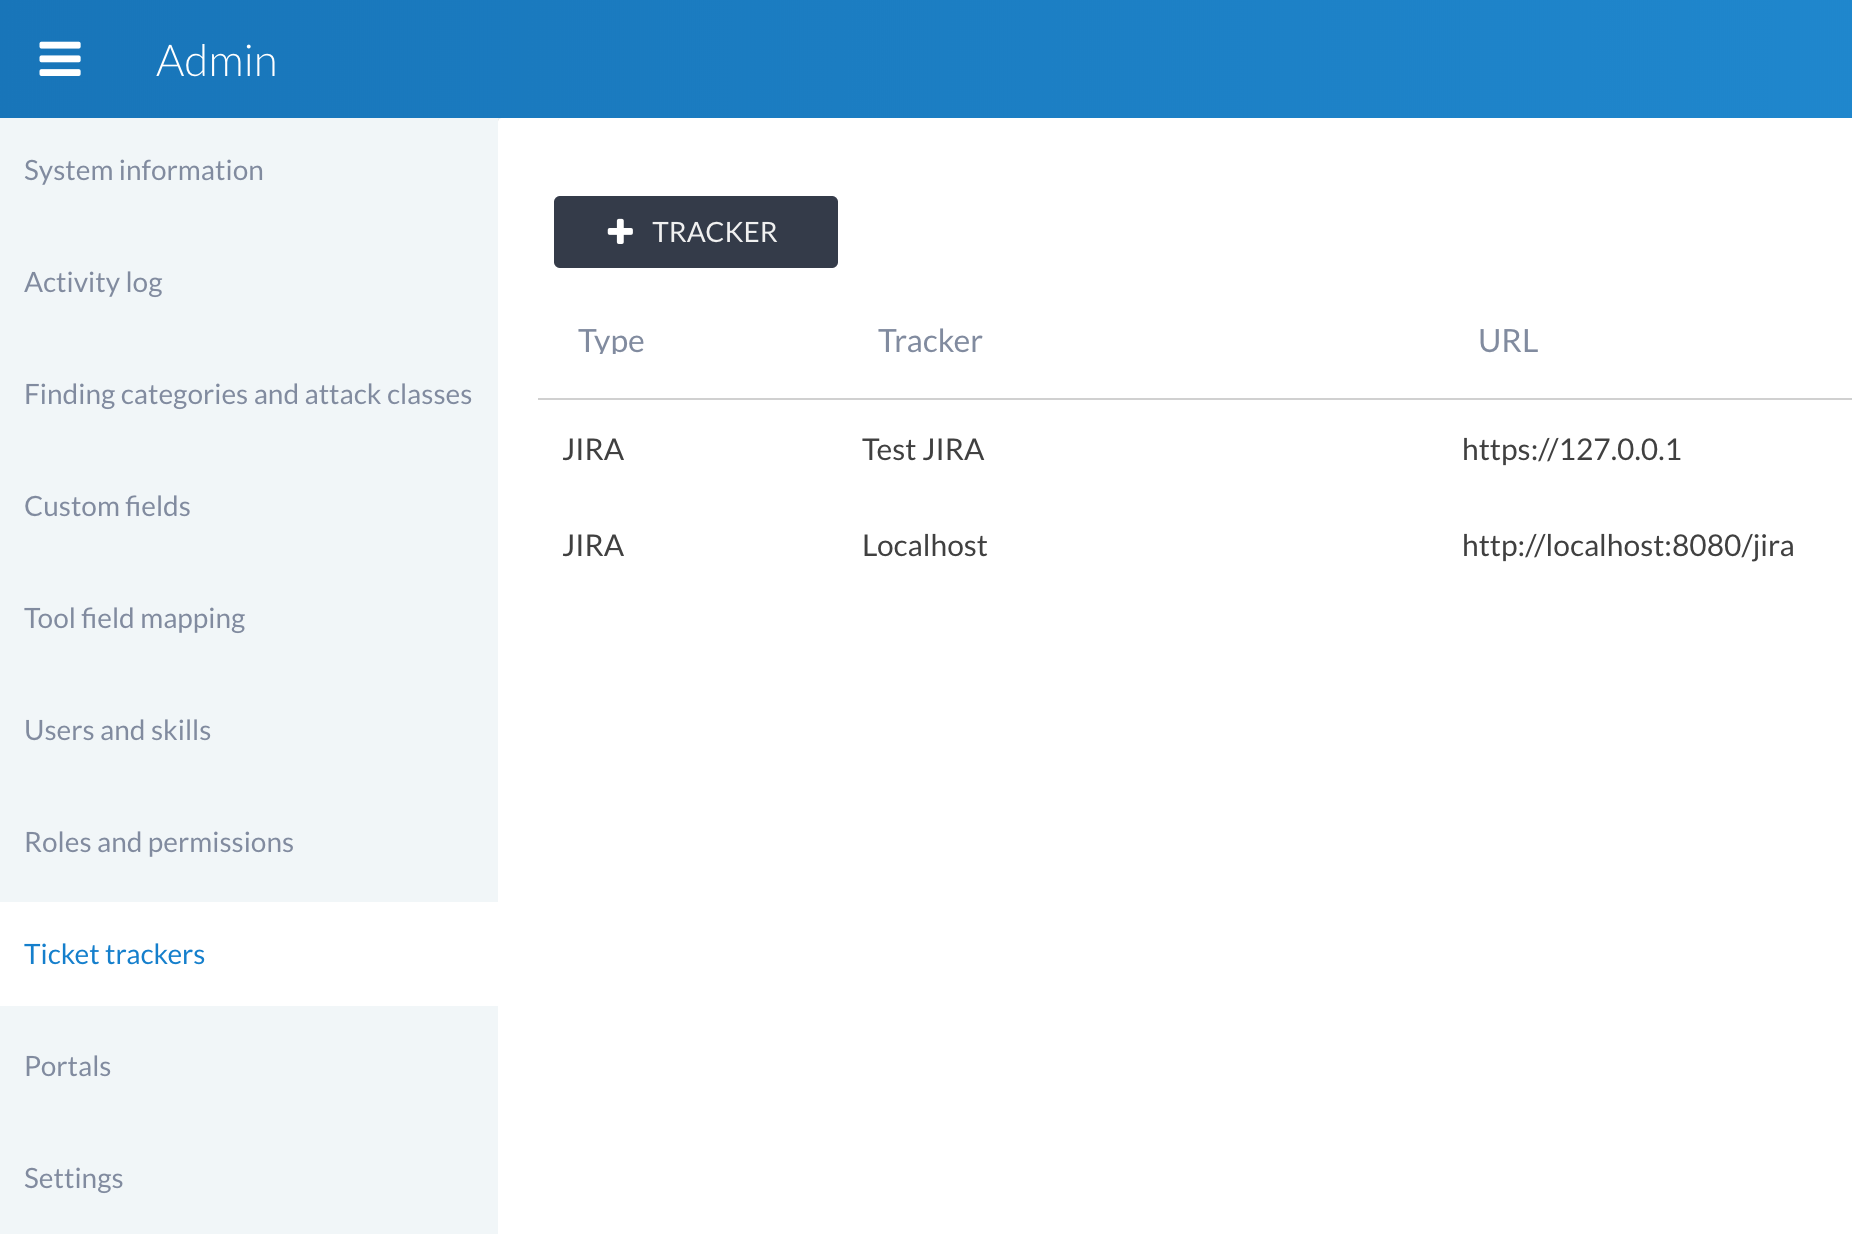
Connecting Jira and Canopy is currently an admin task and is performed under the Admin → Ticket Trackers section of Canopy. Navigating to that section provides the option to create a new ticket tracker and to view/edit existing ones:
Clicking the + TRACKER button shows the New ticket tracker window, which allows you to set the following fields for each ticket tracker:
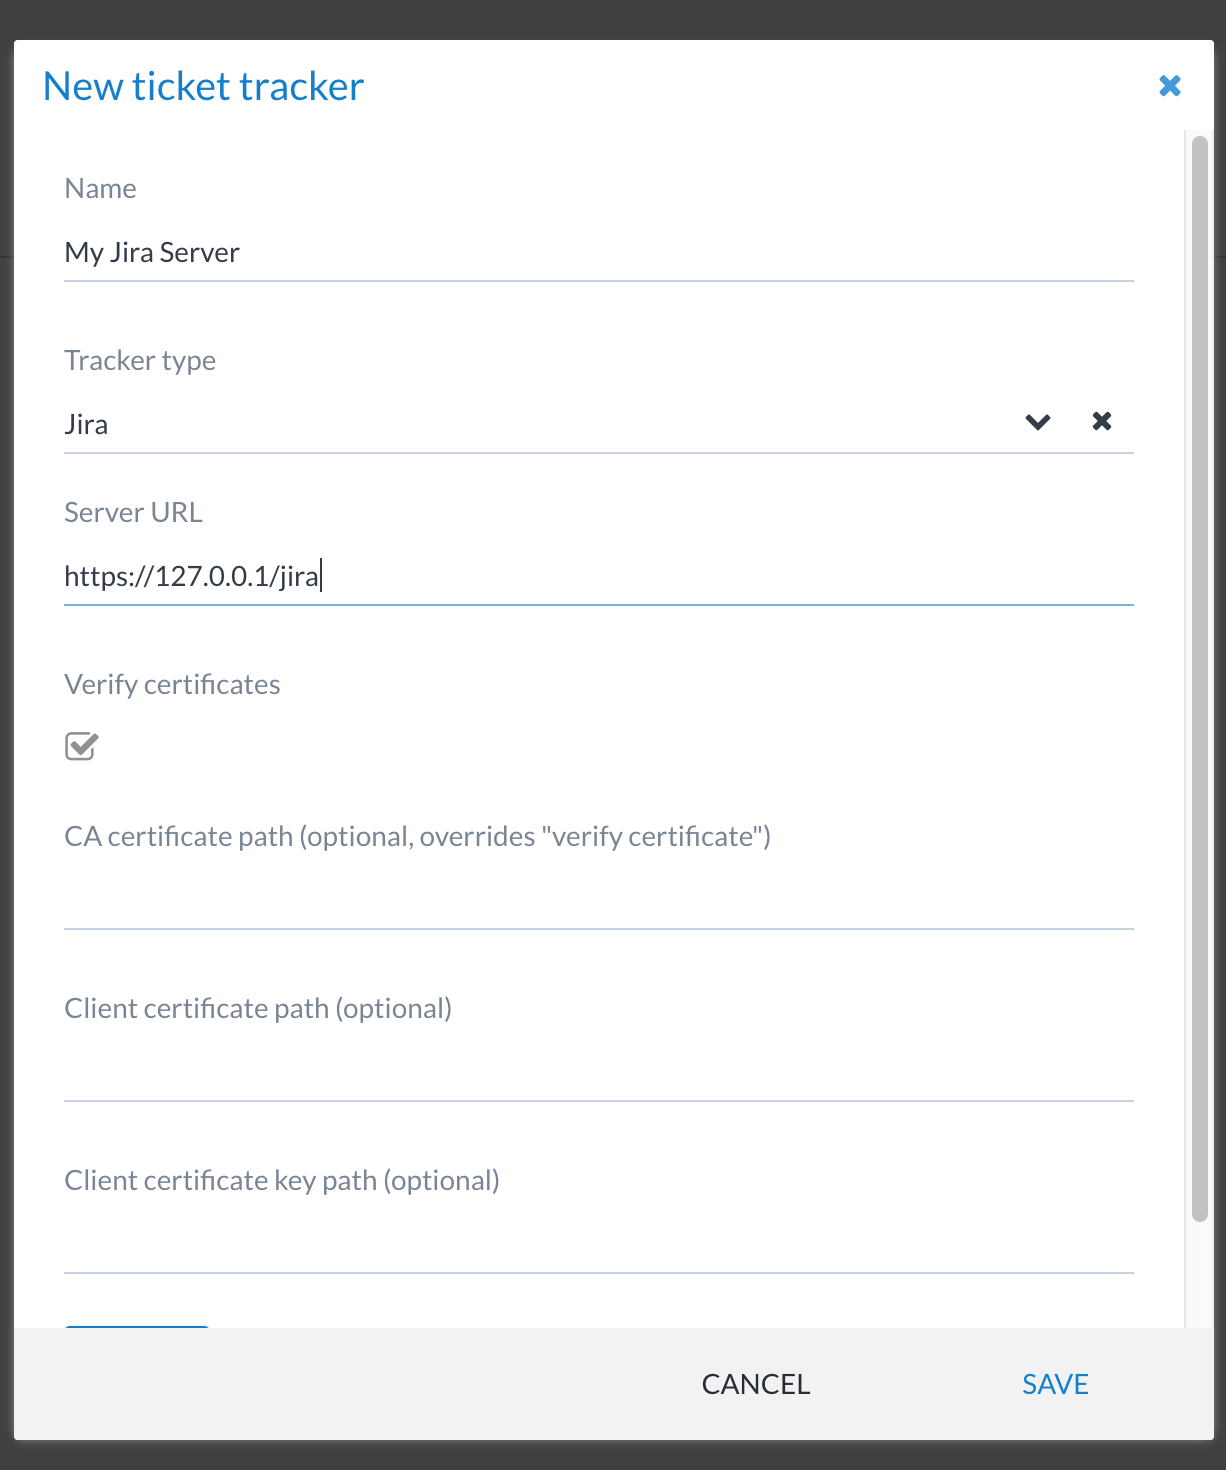
It presents a form with the following fields:
- Name
A name used to reference the ticket tracker.
- Tracker type
The type of ticketing system we’re connecting to.
- Server URL
The full URL for connecting to the ticketing system.
- Verify certificates
Allows administrators to turn on/off TLS certificate validation (turn it off to allow for self-signed certificate - not recommended, but may be required in certain environments).
- CA certificate path (optional)
Allows one to specify a custom CA path for certificate verification.
- Client certificate path (optional)
The path to the client certificate on the operating system (e.g.
/etc/ssl/certs/mycert.crt). Note that the key must be accessible by Canopy (file permissions).- Client certificate key path (optional)
The path to the client secret key on the operating system (e.g.
/etc/ssl/keys/mykey.key). Note that the key must be accessible by Canopy (file permissions).
Jira is the only type of ticket tracker currently supported. Support for Service Now will be added in Q1 2019.
Authenticating to Jira
Below the main fields, one can configure the authentication options:
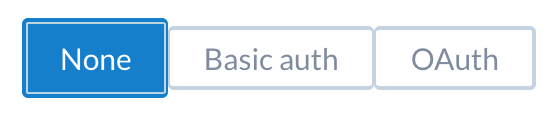
- None
No authentication is required.
- Basic auth
Username and password.
- OAuth
Using the access tokens obtained above.
The following section appears at the end of the ticket tracker add/edit screen. Select the authentication type required and fill in the values:
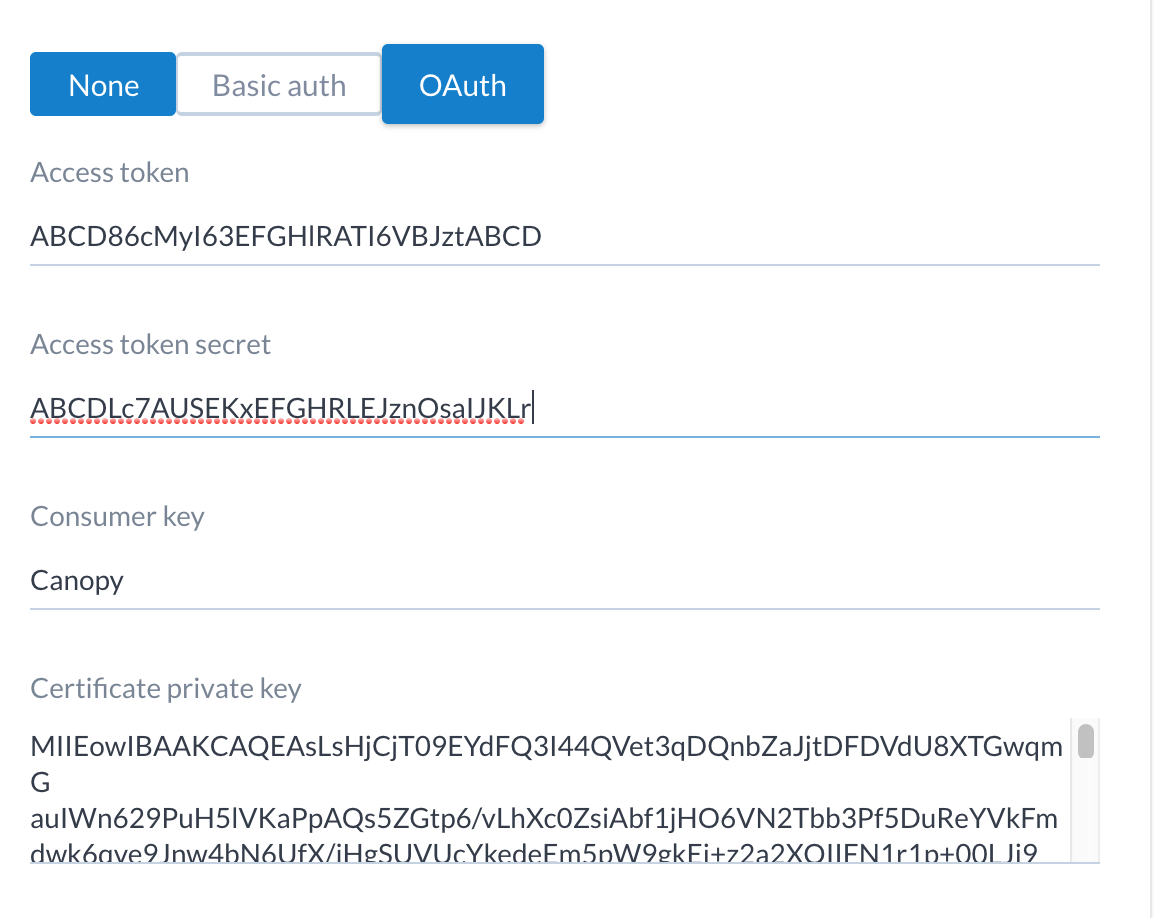
The token and key information was obtained in the section above.
Checking configurations and access
If you need to check the configuration and access to a ticket tracker, select the ticket tracker and click on the info icon in the menu bar:

Confirm that the current user and other fields are correct and that the container list is being populated by Jira projects.
Deleting ticket trackers
A ticket tracker can be deleted by selecting the ticket tracker and deleting it using the delete icon.
Working with Jira
Once the administrative side is set up, users can now work with Jira. For further information, see Working with Jira.